Otentic Theme
Otentic Theme / template documentation version 1.0
Introduction
First of all, Thank you so much for purchasing this template and for being my loyal customer.
This documentation is to help you regarding each step of customization. Please go through the documentation carefully to understand how this template is made and how to edit this properly.
Before you start customizing
If you plan to make some modifications to the code of the theme, will be better to make them via the child theme. If you make modifications directly to the parent theme, you will lose them when the theme is updated. When you make modifications inside of the child theme instead, you can update the parent theme without losing any change you have made.
Child Theme you’ll find in a otentic-child.zip, which is included in a main downloaded package.
More information about child themes you can find in WordPress Codex.
Getting Started #back to top
To install this theme, you must have a working version of WordPress already installed.
How to Install WordPress #back to top
For information regarding installing the WordPress platform, please see the WordPress Codex
How to Install Theme #back to top
Upload via WordPress Admin
To add a new theme to your WordPress installation, follow these basic steps:
- Download a package from ThemeForest in a Downloads section
- Log in to the WordPress Administration
- Go to Appearance › Themes › Add New › Upload Theme
- Browse and select theme zip folder called otentic.zip (is located inside of downloaded zip package)
- Press Install Now button
- Activate theme with Activate link
Upload via FTP Server
Use your FTP Client to upload non-zipped folder called otentic (Unzip the otentic.zip file) and otentic-child (optional child theme) into the /wp-content/themes/ folder on your server.
How to Update Theme #back to top
To update the theme please follow these basic steps:
- Download an updated package from ThemeForest in a Downloads section
- Log in to the WordPress Administration
- Go to Appearance › Themes
- Activate other theme than Otentic
- Click on outdated theme and remove it (all content, widgets and theme options will be preserved)
- Go to Appearance › Themes › Add New › Upload Theme
- Browse and select theme zip folder called otentic.zip (is located inside of downloaded zip package)
- Press Install Now button
- Activate theme with Activate link
Necessary Plugins #back to top
To add the needed functionality to the theme is necessary to activate the required plugins.
- Go to Appearance › Install Plugins
- Install and activate plugins you want to use with a theme.
Import Demo #back to top
To automatically import the demo data into your WordPress, follow these basic steps:
- Go to Appearance › Install Plugins
- Install and activate plugin One Click Demo Import, if not installed yet
- Go to Appearance › Import Demo
- Press Import
- Let the importer work until it displays information about successful (or unsuccessful) importing (it may take several minutes).
What if the Import fails or stalls?
If the import stalls and fails to respond after a few minutes, or it fails with a simple error message like “Import failed,” You are suffering from PHP configuration limits that are set too low to complete the process. You should contact your web host and ask them to increase those limits to a minimum as follows:
- max_execution_time 600
- memory_limit 128M
- post_max_size 32M
- upload_max_filesize 32M
Pages #back to top
Home Page
To set up the homepage, follow these steps:
- Create a new page by going to Pages › Add New
- Fill in the Title of the page (for example: Home).
- Press Publish and page will be saved
- Go to Settings › Reading
- Check the radio button A static page (select below)
- Select Front page: called as created page (for example: Home)
- Press Save Changes
Page/Block patterns
The theme comes with a list of built-in block patterns. To get started, we’ll create a new page, though you can use an existing page or post as well.
- To add the block pattern to the page, click the “Add block” button on the upper left of the editor (a large “+” within a blue box).
- Then, click on the Patterns tab.
- Within the Patterns tab, you’ll see a number of premade patterns that are included with WordPress. Click on the pattern and it will be automatically added to the page. From there, we can tweak the blocks to our heart’s content.

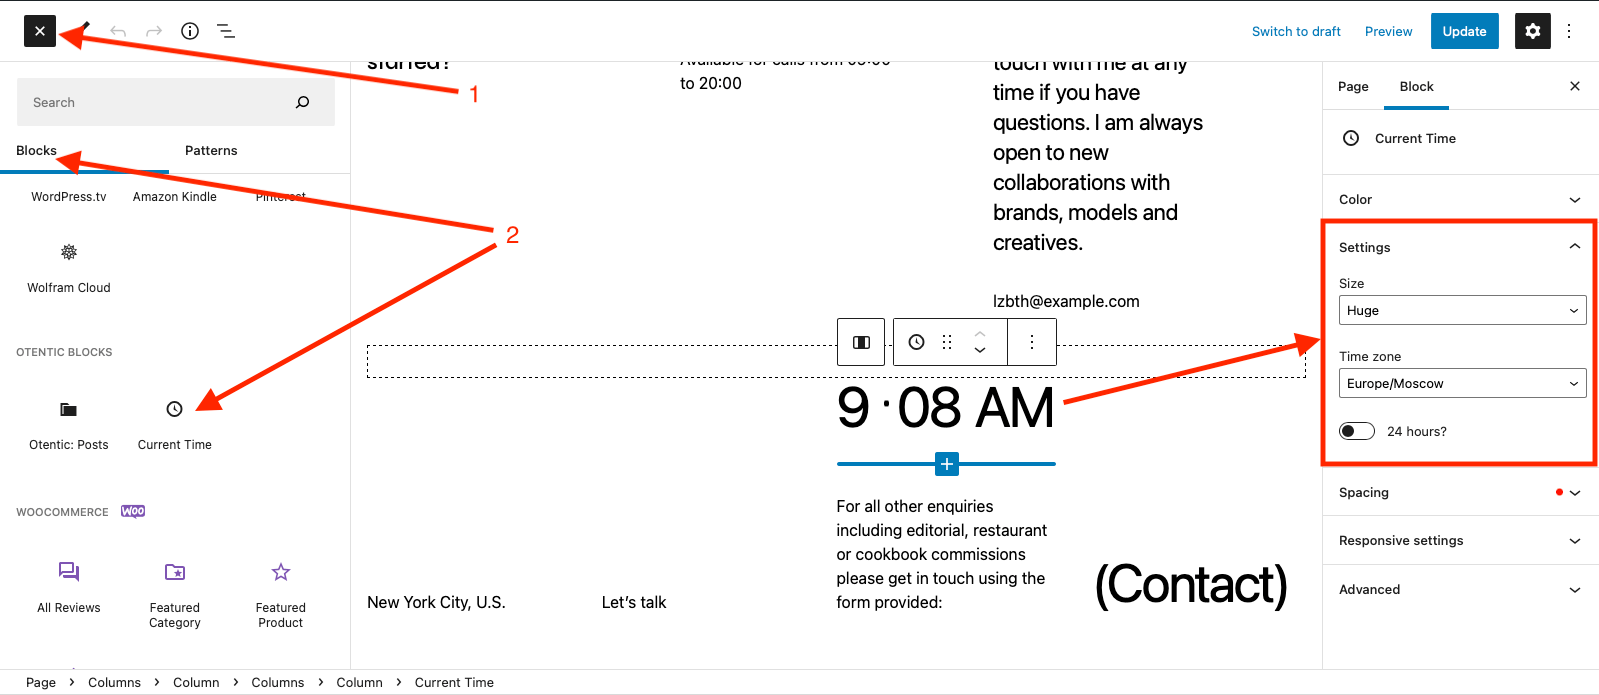
Local Time Block
You can add a block with your local time to any page using the Add block button.
Contact Form
To set up the contact page with a contact form, follow these steps:
- Go to "Appearance › Install Plugins"
- Install and activate plugin Contact Form 7, if not installed yet
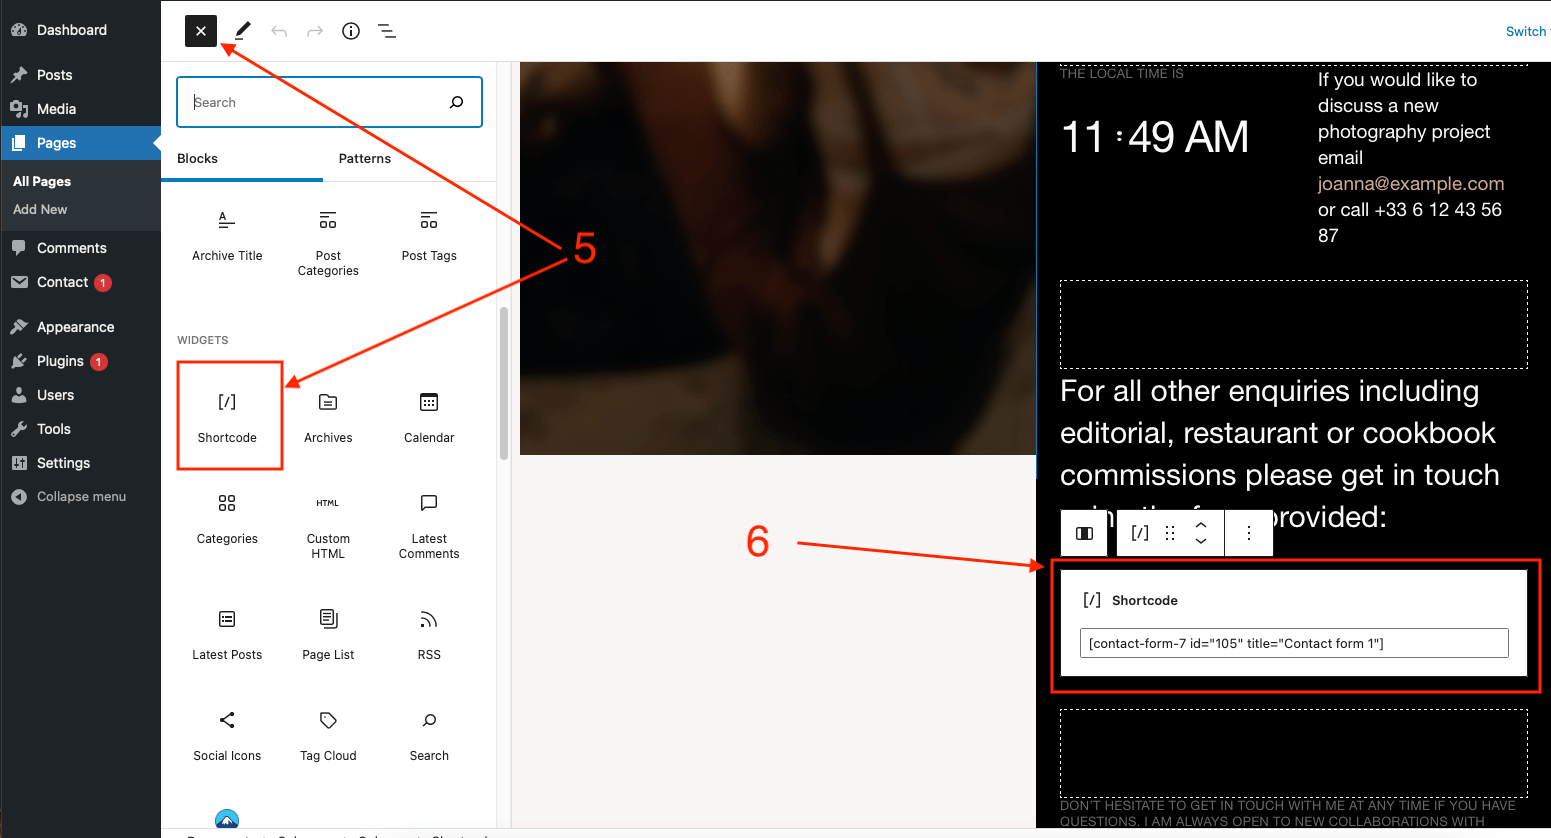
- Open the "Contact › Contact Forms" menu on your WordPress administration panel. Just after installing the Contact Form 7 plugin, you’ll see a default form named "Contact form 1", and a shortcode like this:
[contact-form-7 id="105" title="Contact form 1"]
Copy this code. - Create a new page by going to "Pages › Add New"
- Click the +Plus icon and select “Widgets › Shortcode”
- Paste the code you copied into the content of the shortcode.
This is the contact form template from the demo:
<div class="wp-block-columns">
    <div class="wp-block-column">
        [text* your-name placeholder "Your Name"]
    </div>
    <div class="wp-block-column">
        [email* your-email placeholder "Your Email"]
    </div>
</div>
[text* your-subject placeholder "Subject"]
[textarea your-message x5 placeholder "Your Message"]
[response]
[submit "( ✉️ Send message )"]

How to Hide the Page Title
In some cases, like when you’re building your homepage or a landing page, you might want to remove the page title.To remove the page title, go to the WordPress page dashboard, and in the page attribute box, under template, choose the No Title template.
Blog & Portfolio #back to top
The Otentic theme comes with advanced options to make adjustments to individual standard post categories via the admin so you can easily change the layout, colors…etc on a per-category basis. Simply log into WordPress and go to Posts > Categories and click on the category you wish to edit to access these settings.
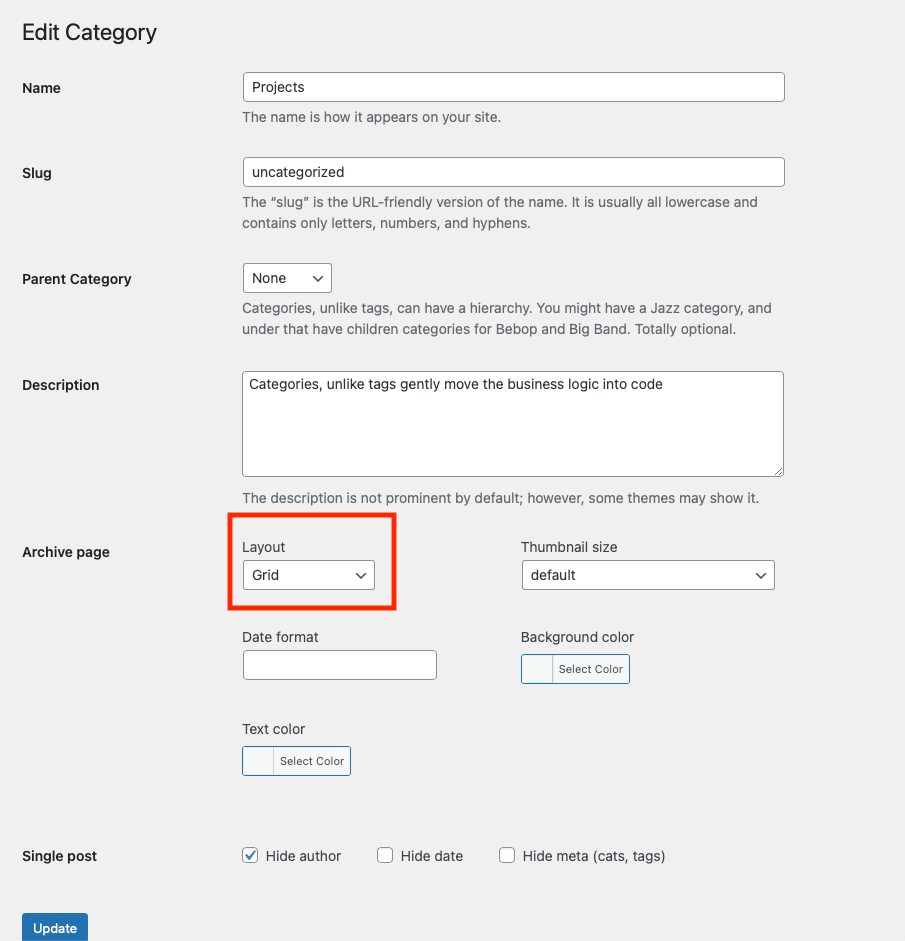
Image Sizes #back to top
The Otentic theme defines new image sizes, but the problem is that these new image sizes are only applied on the images you upload after activating the theme. To solve this problem you need to generate new sizes for all previously uploaded images. You can use the Regenerate Thumbnails plugin.
WebGL
You can enable/disable WebGl Animations by going to Appearance › Customize > Theme Settings > Base
Lightbox
Otentic comes with built-in Lightbox functionality. If you insert an image into your post that links to it’s “media” file, it will add lightbox support to the link.
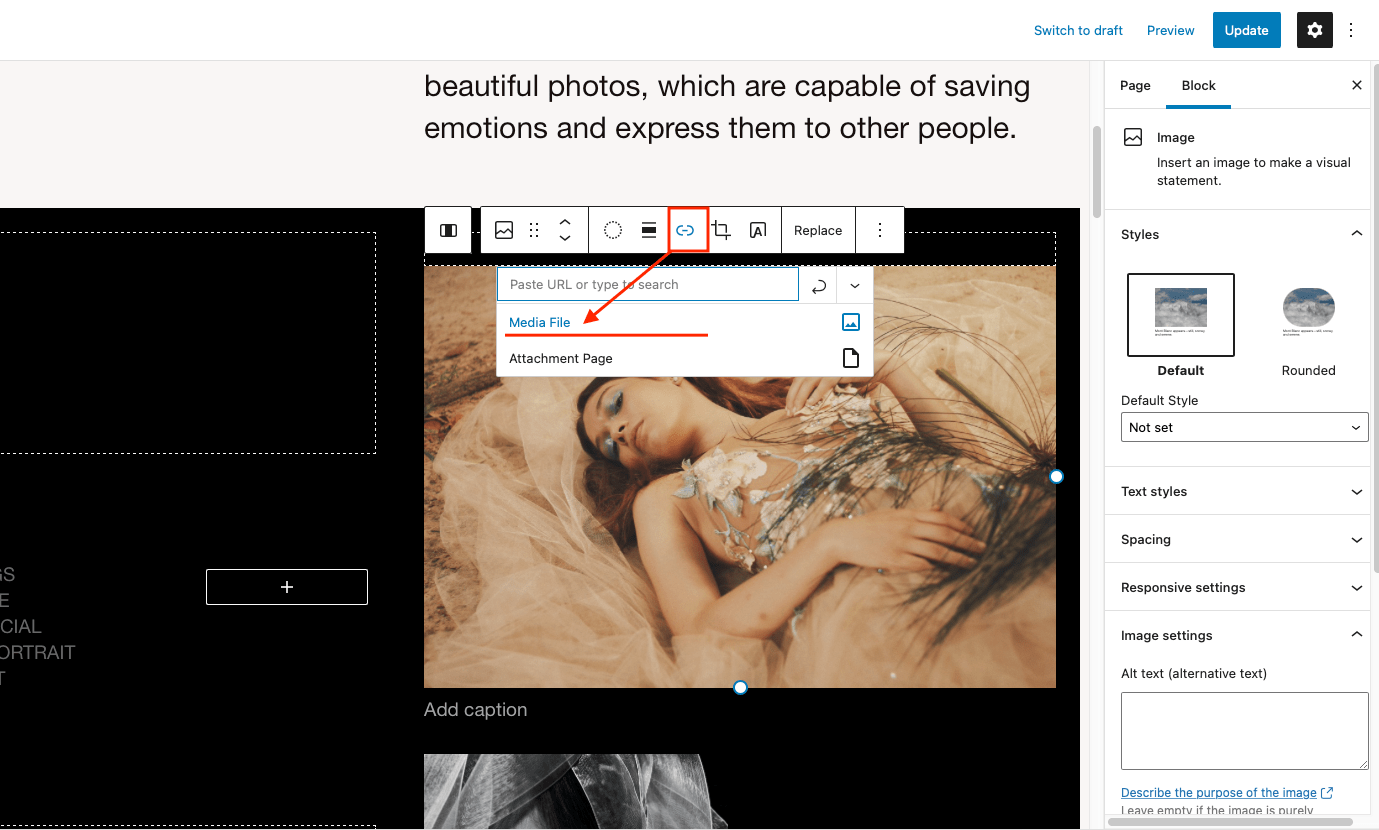

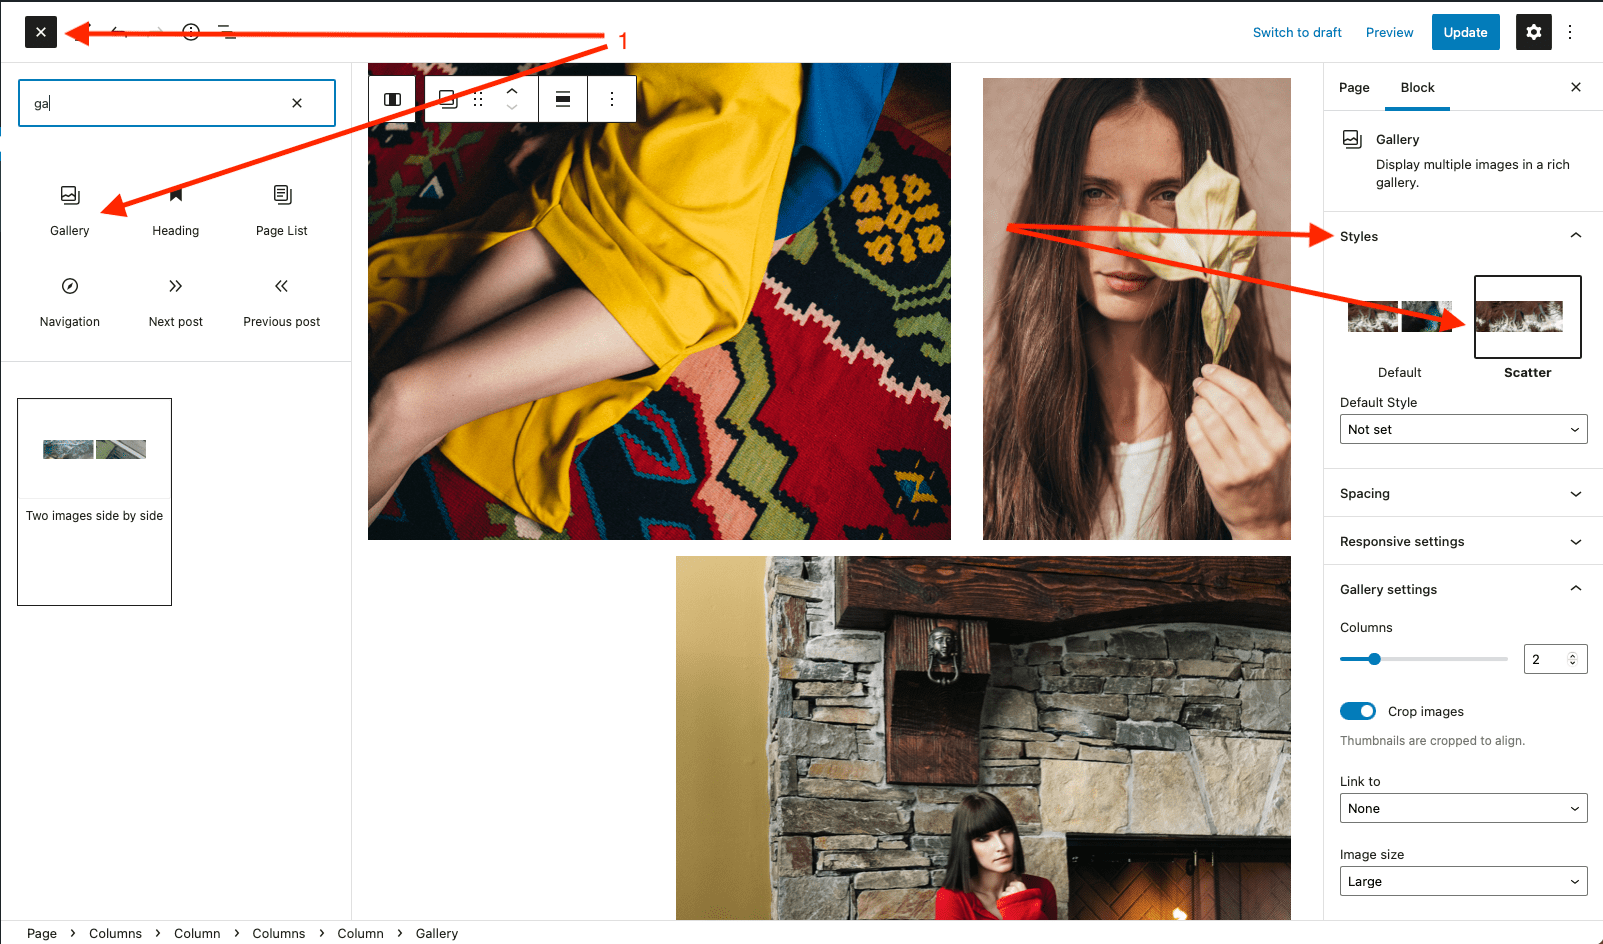
How to add Gallery
- Click the +Plus icon and select “Media › Gallery”
- Add images to a gallery
- Set a gallery style
- Select Media File in the Link to field to activate zoom mode.
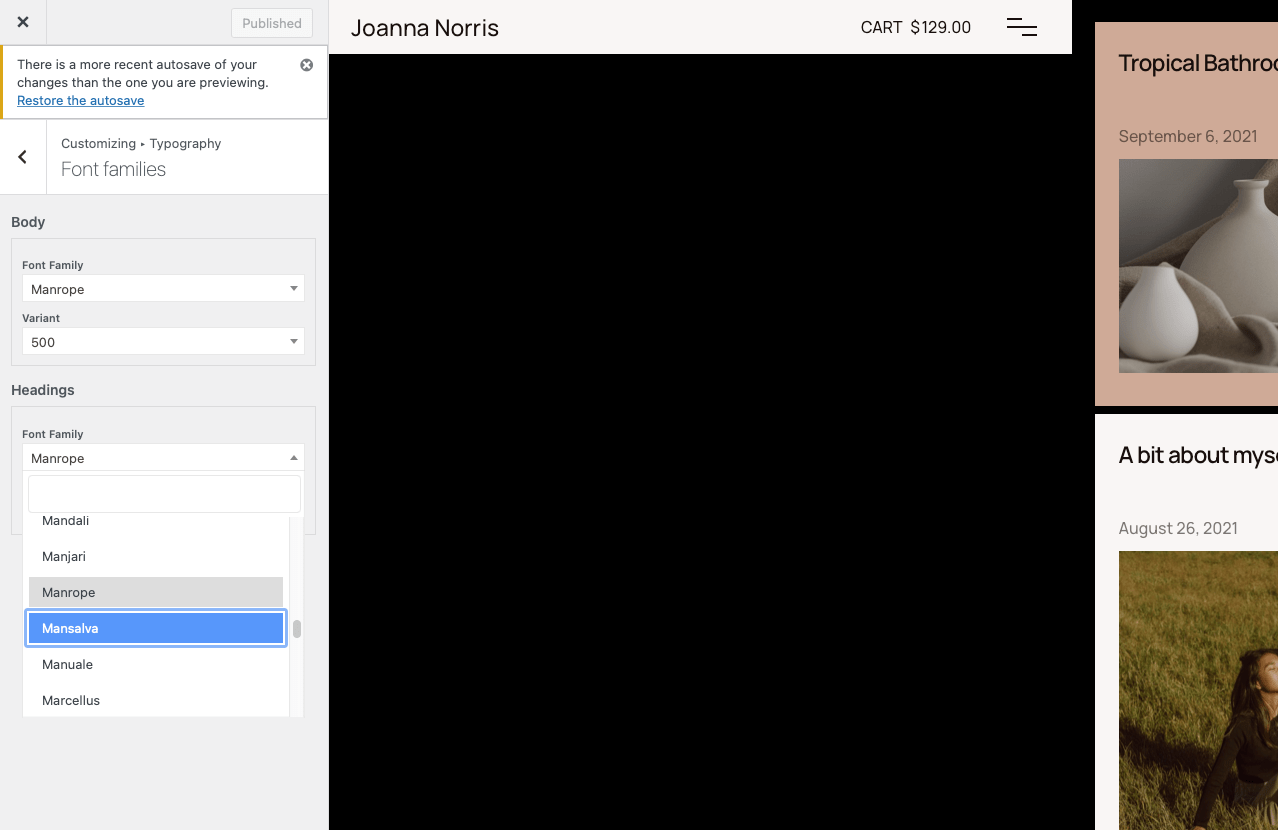
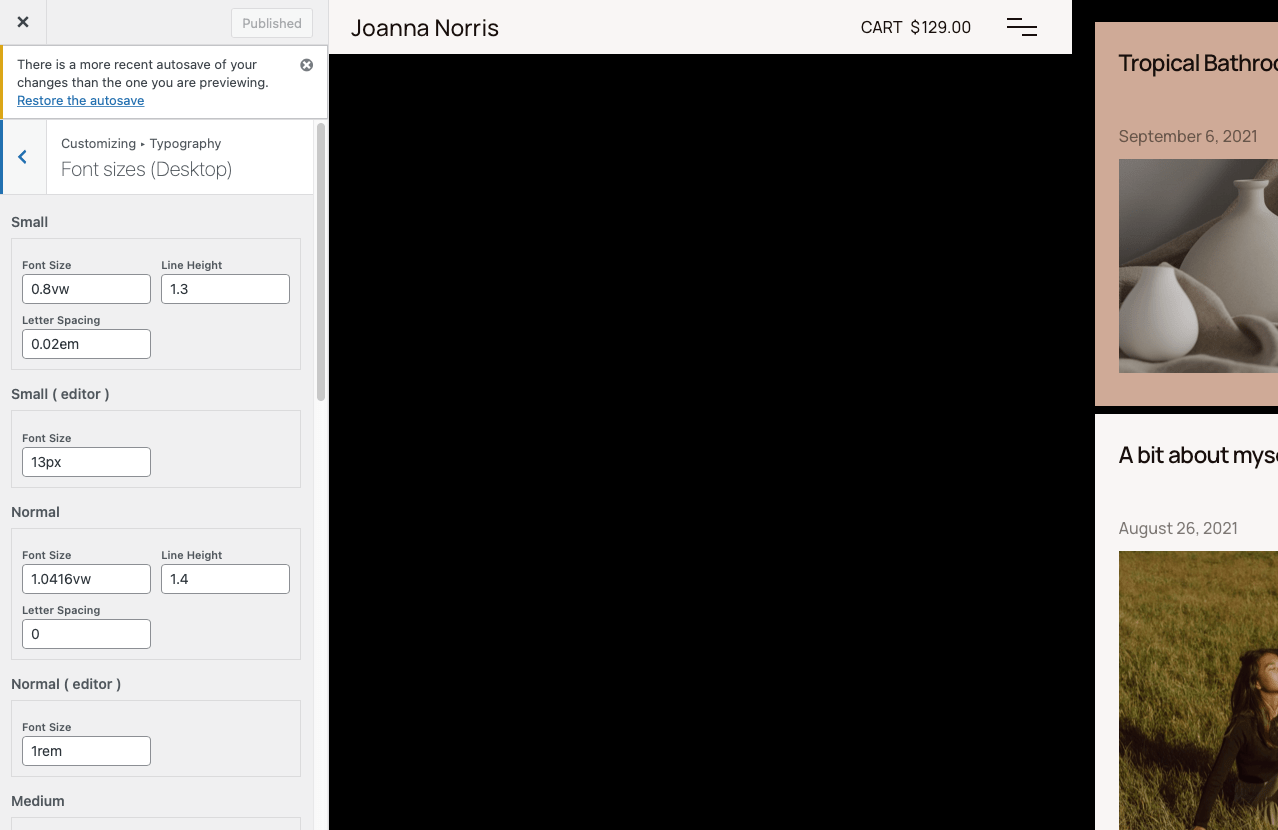
How To Alter Your Fonts & Typography #back to top
Default theme typography
Simply go to Appearance > Customize > Typography and here you will find options for all the main sections of the site so you can customize the default theme typography.

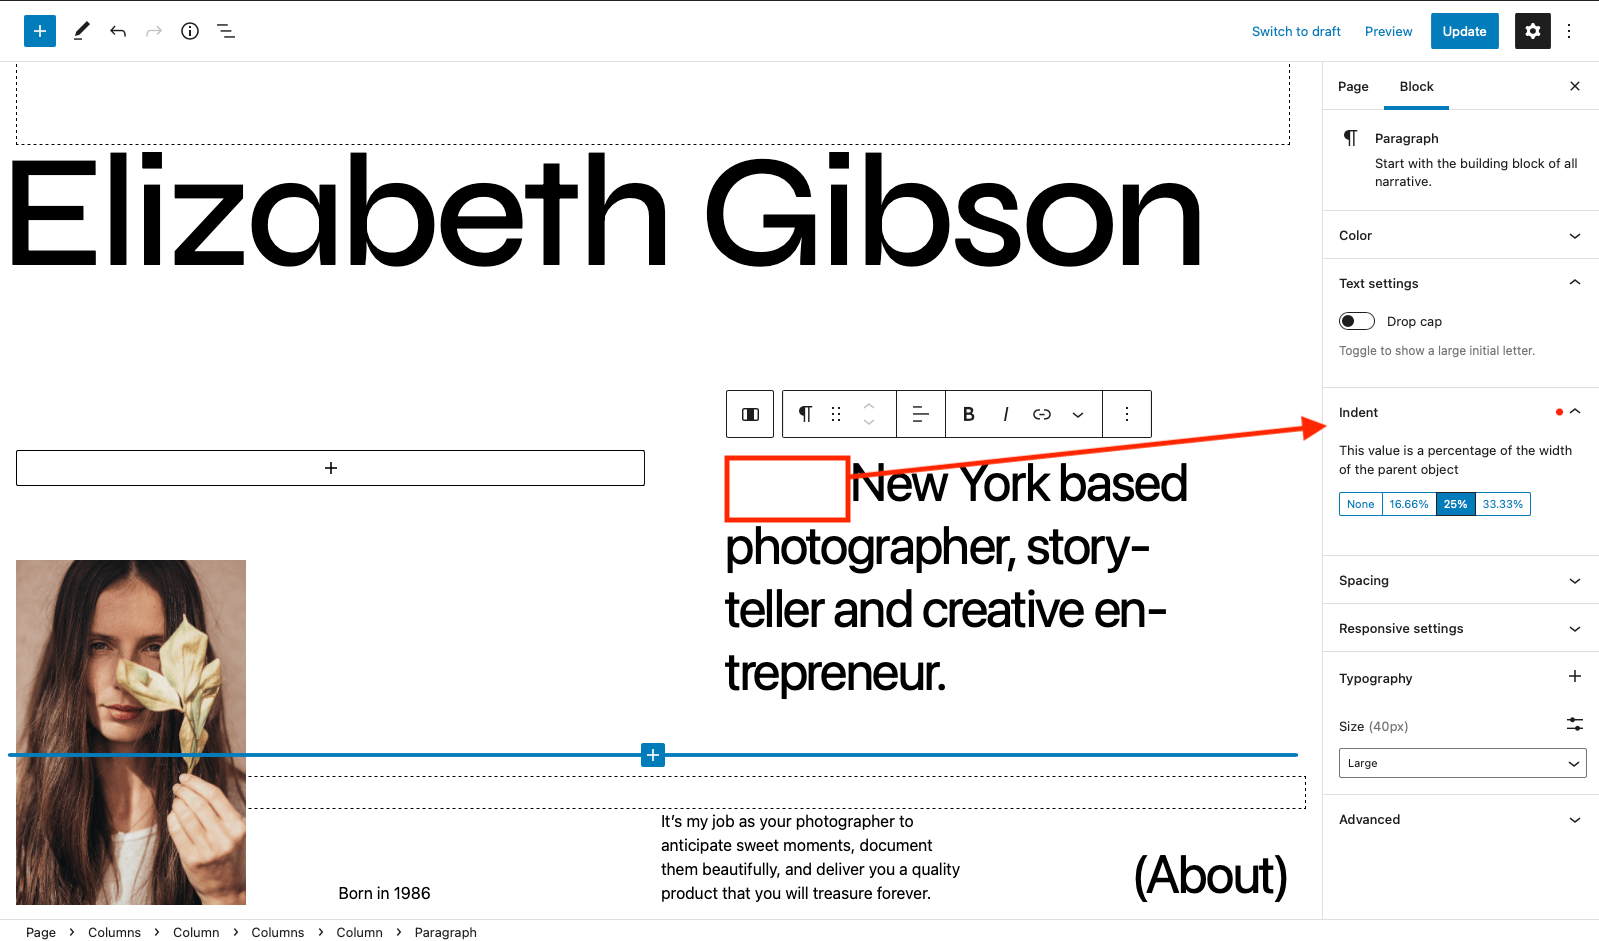
Block typography
Change typography on any blocks to achieve better and stunning block patterns and page designs.
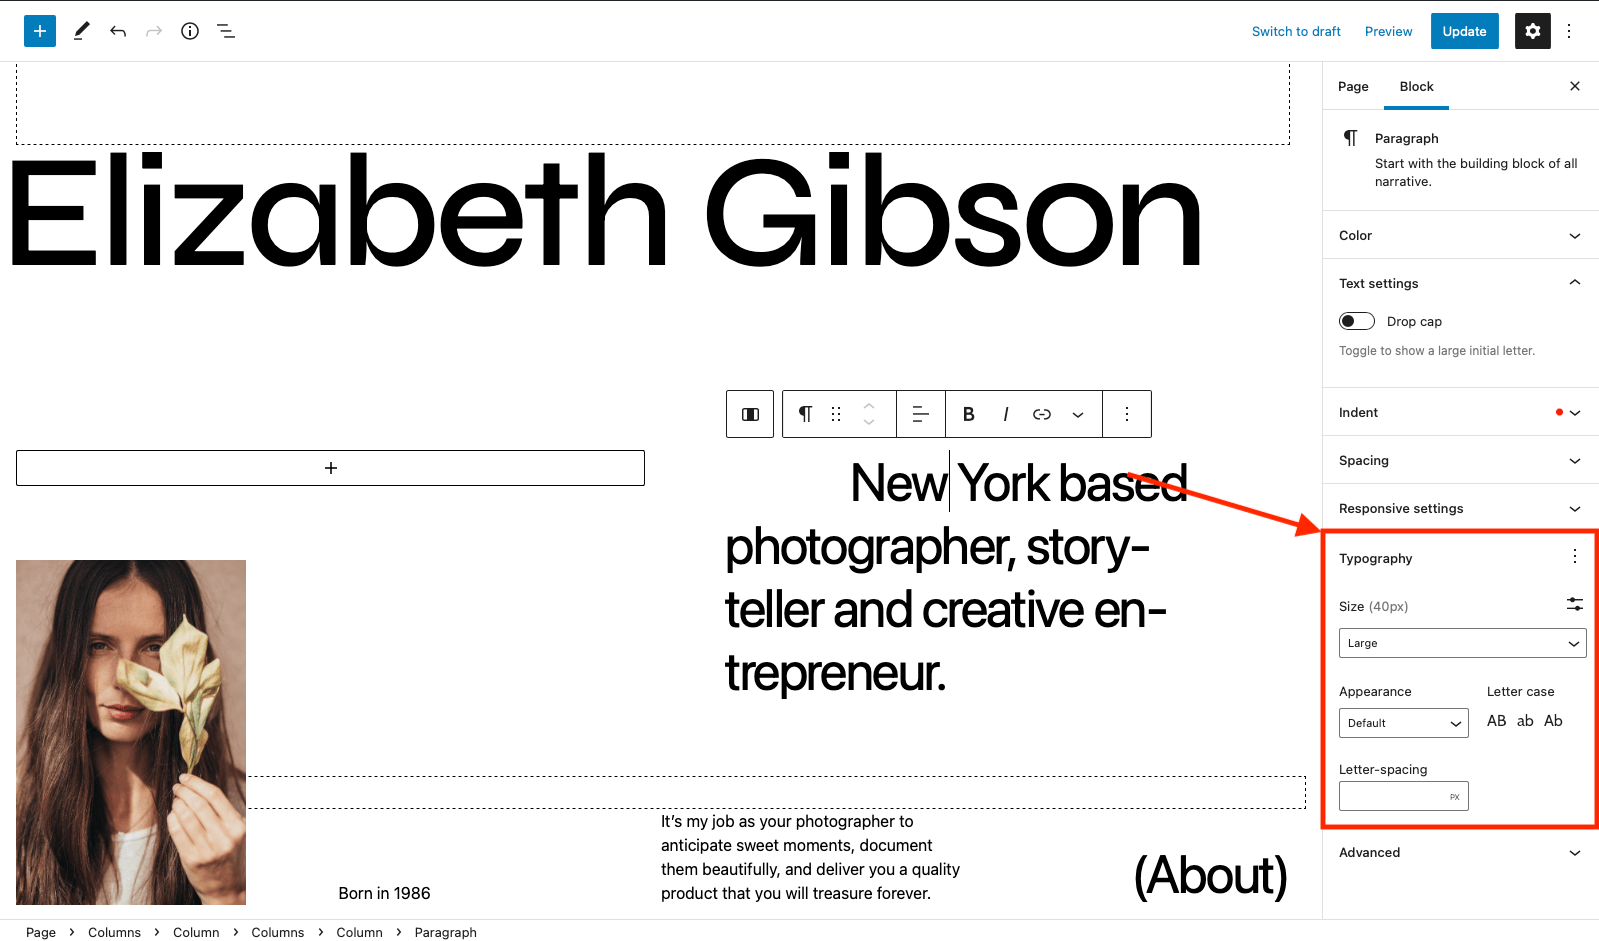

You can enable the Text Indent option from the menu on your right.
Adding a custom font #back to top
It’s possible to use your own custom font files in the theme if you want something that’s not a Google font.
Install the child theme
Create a fonts folder in the child theme.
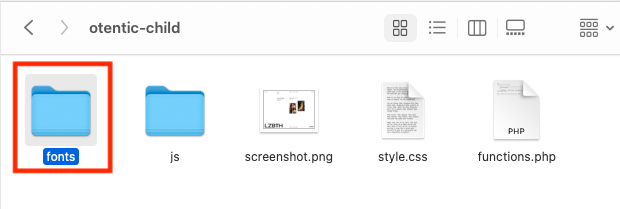
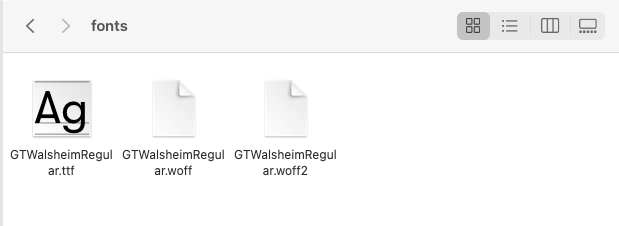
We’re going to put our custom font into this fonts folder. For the sake of the example, I’m using GT Walsheim. There’s a ttf, woff and woff2 version of the font.
Edit style.css
Next, you’ll need to add some custom CSS within your child theme’s style.css file to reference this new font. There’s a reference to local also. If the user happens to have the font already installed there’s no need to download it also.
    @font-face {
      font-family: 'GTWalsheim';
      src: local('GTWalsheim'), local('GTWalsheim'),
        url('fonts/GTWalsheimRegular.woff2') format('woff2'),
        url('fonts/GTWalsheimRegular.woff') format('woff'),
        url('fonts/GTWalsheimRegular.ttf') format('truetype');
      font-weight:  400;
      font-style:   normal;
      font-stretch: normal;
      font-display: swap;
      unicode-range: U+000-5FF;
    }
Note that I’ve called the font-familly – GTWalsheim – this is important.
-
Edit functions.php
Add the following code to the child theme’s functions.php file.
function otentic_child_custom_fonts( $standard_fonts ) { $my_custom_fonts = array(); $my_custom_fonts['GTWalsheim'] = array( 'label' => 'GT Walsheim', 'variants' => array('regular','italic','700','700italic'), 'stack' => 'GTWalsheim, sans-serif', ); return array_merge_recursive( $my_custom_fonts, $standard_fonts ); } add_filter( 'kirki/fonts/standard_fonts', 'otentic_child_custom_fonts', 20 ); -
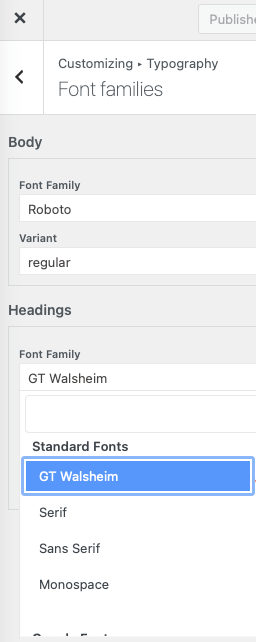
Apply it in the customizer
Now, when you edit a typography element in the customizer you should see this new font as an option in the dropdown. If you’ve done everything correctly it will render.
Menu #back to top
Create a Menu
- Go to Appearance > Menus and click the link to create a new menu.
- Give your menu a name and click the button to create menu. To add menu items, simply select options in the left side column by checking the box for pages categories, tags etc that you want to include and then click the Add to menu button.
-
You can add a thumbnail for each menu item:

- When you are done adding links, select a menu location by checking one of the options listed under Theme locations and then save your menu.
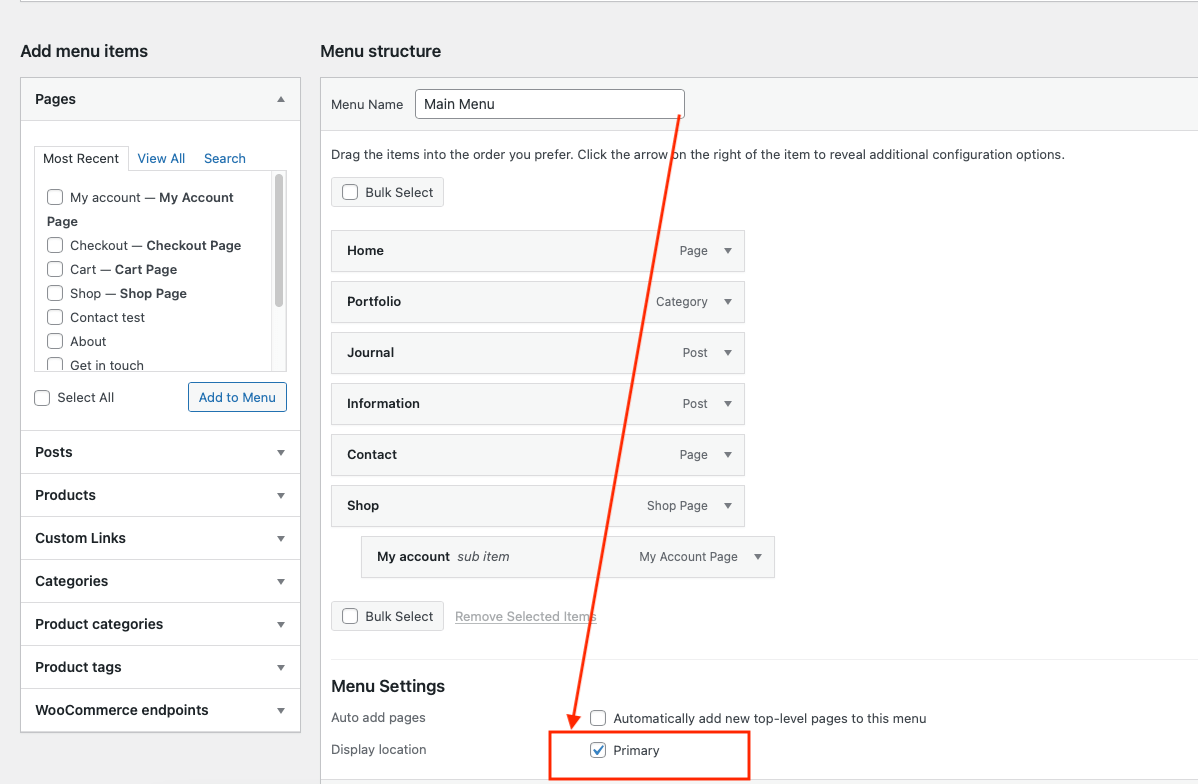
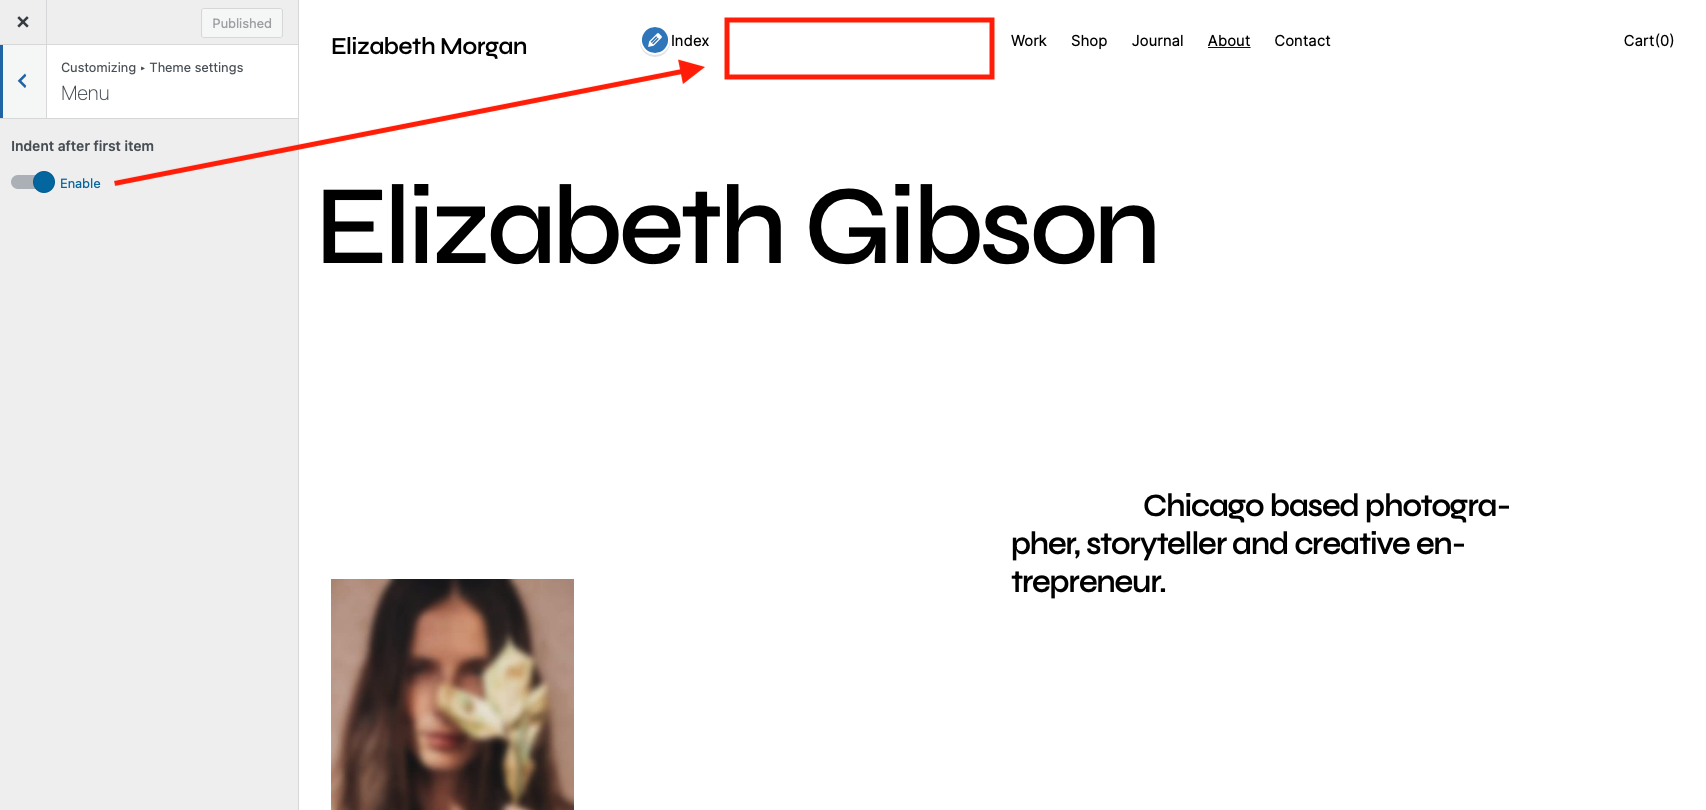
Indentation
- Go to Appearance > Customize > Theme settings > Menu and turn on the radio button to add padding from the first element.
WooCommerce #back to top
Before you start
- Go to Appearance › Install Plugins
- Install and activate WooCommerce plugin, if not installed yet
How To Define Your WooCommerce Shop Page
In WooCommerce you must declare your “shop” page which will be used to display your recent products but also used in the theme’s breadcrumbs trail. To define your page you first need to create a standard page (if you haven’t done so yet) then go to WooCommerce > Settings then click on the “Products” tab then on the “Display” sub-tab where you will find the dropdown option.

Footer #back to top
- Go to “Appearance › Widgets”
- Add widgets to the “Footer” widget area.

Customization #back to top
Before you start customizing
- Go to Appearance › Install Plugins
- Install and activate Kirki plugin, if not installed yet
The theme includes tons of easy to use options to customize the design of your site. Most of your theme options can be found in the live WordPress theme customizer.
Simply navigate to Appearance > Customize to make changes to the design of your website.
Support Desk #back to top
- * Responding to questions or problems regarding the item and its features
- * Fixing bugs and reported issues
- * Providing updates to ensure compatibility with new software versions
- * Customization and installation services
- * Support for third party software and plug-ins