With this document you will get general
information about Craise theme.
Hope that will be helpful for
you.
Before you start customizing
If you plan to make some modifications to the code of the theme, will be better to make them via the child theme. If you make modifications directly to the parent theme, you will lose them when the theme is updated. When you make modifications inside of the child theme instead, you can update the parent theme without losing any change you have made.
Child Theme you’ll find in a “craise-child.zip”, which is included in a main downloaded package.
More information about child themes you can find in WordPress Codex.
Getting Started
Installation
To install this theme, you must have a working version of WordPress already installed. For information regarding installing the WordPress platform, please see the WordPress Codex
Installing Theme Using the WordPress Admin
To add a new theme to your WordPress installation, follow these basic steps:
- Download a package from ThemeForest in a “Downloads” section
- Log in to the WordPress Administration
- Go to “Appearance › Themes › Add New › Upload Theme”
- Browse and select theme zip folder called “craise.zip” (is located inside of downloaded zip package)
- Press Install Now button
- Activate theme with Activate link
Installing theme manually via FTP
Use your FTP Client to upload non-zipped folder called “craise” (Unzip the craise.zip file) and “craise-child” (optional child theme) into the “/wp-content/themes/” folder on your server.
Update
To update the theme please follow these basic steps:
- Download an updated package from ThemeForest in a “Downloads” section
- Log in to the WordPress Administration
- Go to “Appearance › Themes
- Activate other theme than Craise
- Click on outdated theme and remove it (all content, widgets and theme options will be preserved)
- Go to “Appearance › Themes › Add New › Upload Theme”
- Browse and select theme zip folder called “craise.zip” (is located inside of downloaded zip package)
- Press Install Now button
- Activate theme with Activate link
Required Plugins
To add the needed functionality to the theme is necessary to activate the required plugins.
- Go to “Appearance › Install Plugins”
- Install and activate plugins you want to use with a theme.
Import Demo
To automatically import the demo data into your WordPress, follow these basic steps:
- Go to “Appearance › Install Plugins”
- Install and activate plugin One Click Demo Import, if not installed yet
- Go to “Appearance › Import Demo”
- Press Import
- Let the importer work until it displays information about successful (or unsuccessful) importing (it may take several minutes).
What if the Import fails or stalls?
If the import stalls and fails to respond after a few minutes, or it fails with a simple error message like “Import failed,” You are suffering from PHP configuration limits that are set too low to complete the process. You should contact your web host and ask them to increase those limits to a minimum as follows:
- max_execution_time 600
- memory_limit 128M
- post_max_size 32M
- upload_max_filesize 32M
Permalinks
The default structure of a permalink uses the post ID as a unique identifier in the url: https://example.com/?p=23. For the SEO of your website is always better to use much friendly pemalinks as: https://example.com/2017/01/01/sample-post. Follow these basic steps to set permalinks:
- Go to “Settings › Permalinks”
- Select your option of permalink structure in “Common Settings”
- Also you can change the category base and tag base (optional)
- Press Save Changes
Image Sizes
The Craise theme defines new image sizes, but the problem is that
these new image sizes are only applied on the images you upload
after activating the theme.
To solve this problem you need to
generate new sizes for all previously uploaded images. You can use
the Regenerate Thumbnails plugin.
Defined image sizes:
- “craise-medium” – width: 600px; height: 800px
- “craise-medium-cropped” – width: 320px; height: 460px
- “craise-large-cropped” – width: 800px; height: 1080px
- “craise-wide-cropped” – width: 600px; height: 460px
- “craise-wide-large-cropped” – width: 1600px; height: 1080px
Content
Home Page
To set up the homepage, follow these steps:
- Create a new page by going to “Pages › Add New”
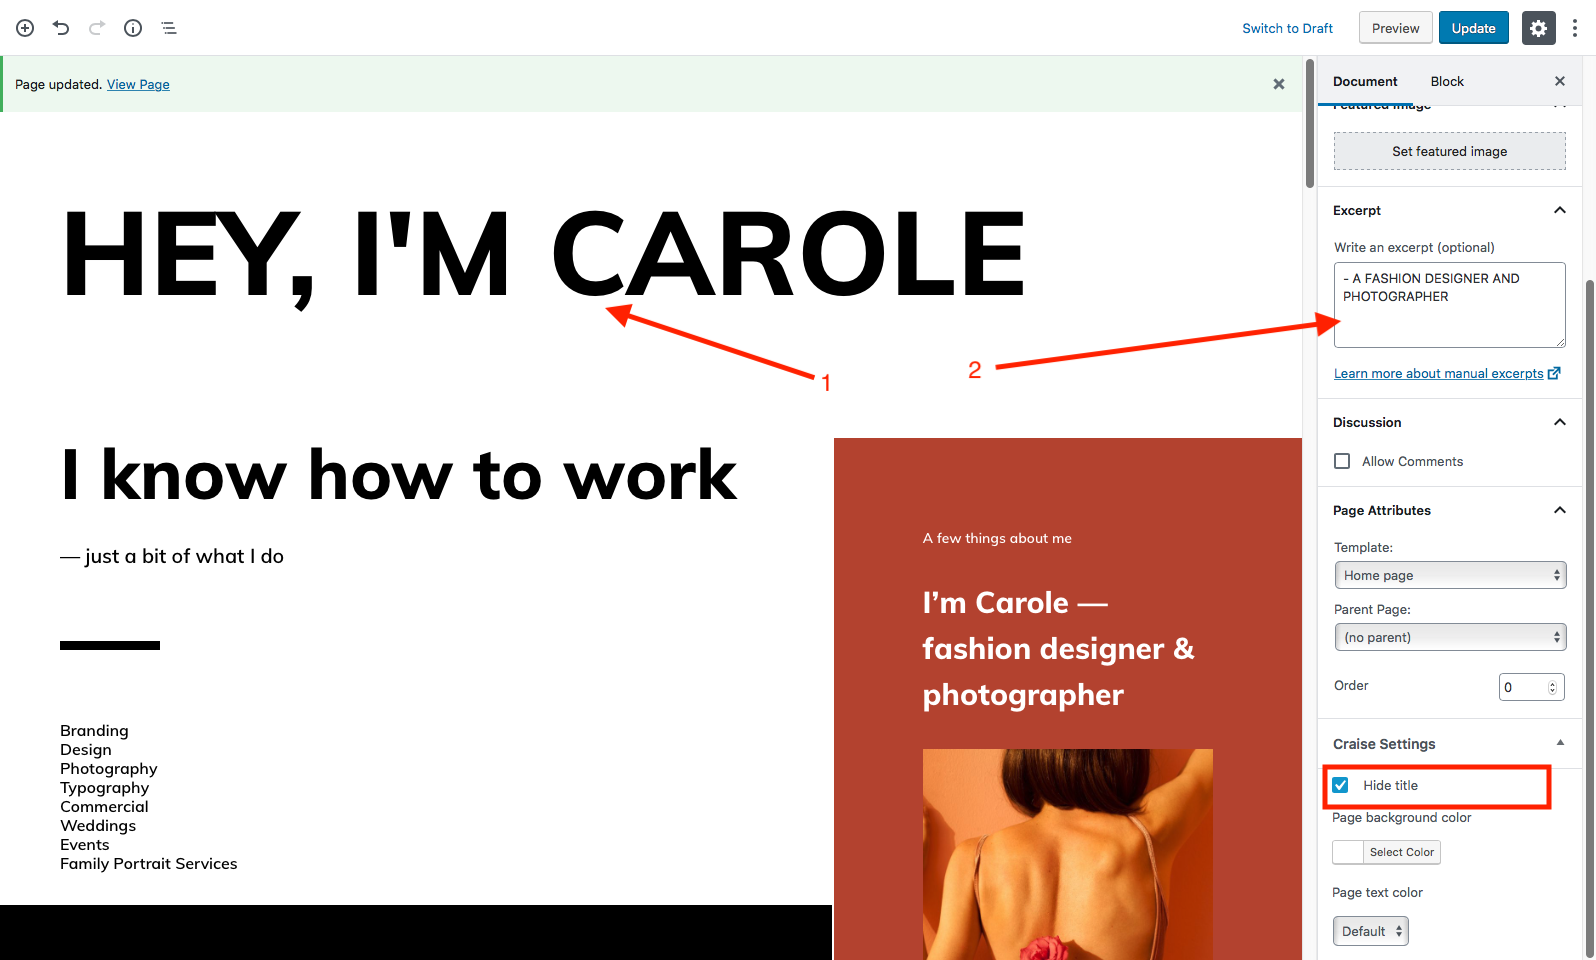
- Fill in the “Title” of the page (for example: “Hey, I’m Carole”).
- Fill in the “Excerpt” of the page (for example: “Fashion designer & photographer”).
- Disable page title.
- Press Publish and page will be saved
- Go to “Settings › Reading”
- Check the radio button “A static page (select below)”
- Select “Front page:” called as created page (for example: “Hey, I’m Carole”)
- Press Save Changes
The title and excerpt will be shown in the preloader
Homepage is now set correctly. Don’t be alarmed that the page is blank for now, now you need to create a layout by following the instructions below.
Home Page Layout
You can assign a custom template for any individual Page by using the Template dropdown in the Edit Page screen (part of the Page Attributes module). You can find the settings from your WordPress Dashboard > Pages. You can either create a new page or edit an existing one.
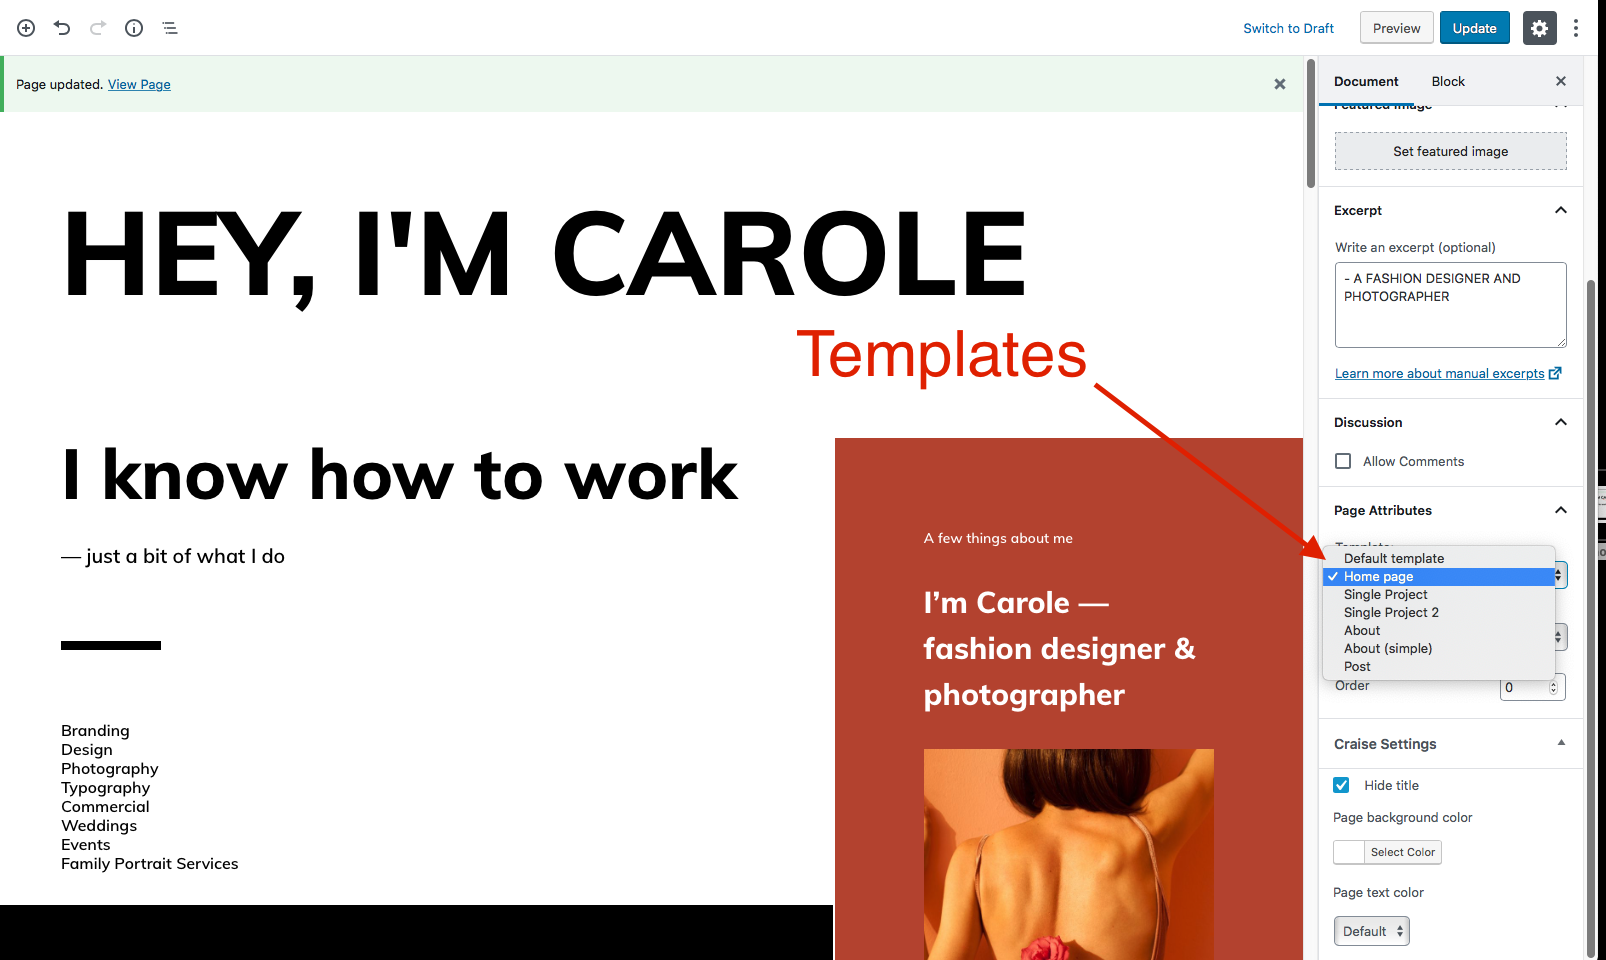
- Select a Template from the list (e.g., Home Page).
- Modify the page content
- Click the Update button (or Save Draft if not yet published).
Hero slider
- Navigate to “Hero Slider” meta box
- Add slider caption
- Add images to the slider using “Add Slide” button.
- Enter a title for each slide. Select slide background color, link text and add the anchor

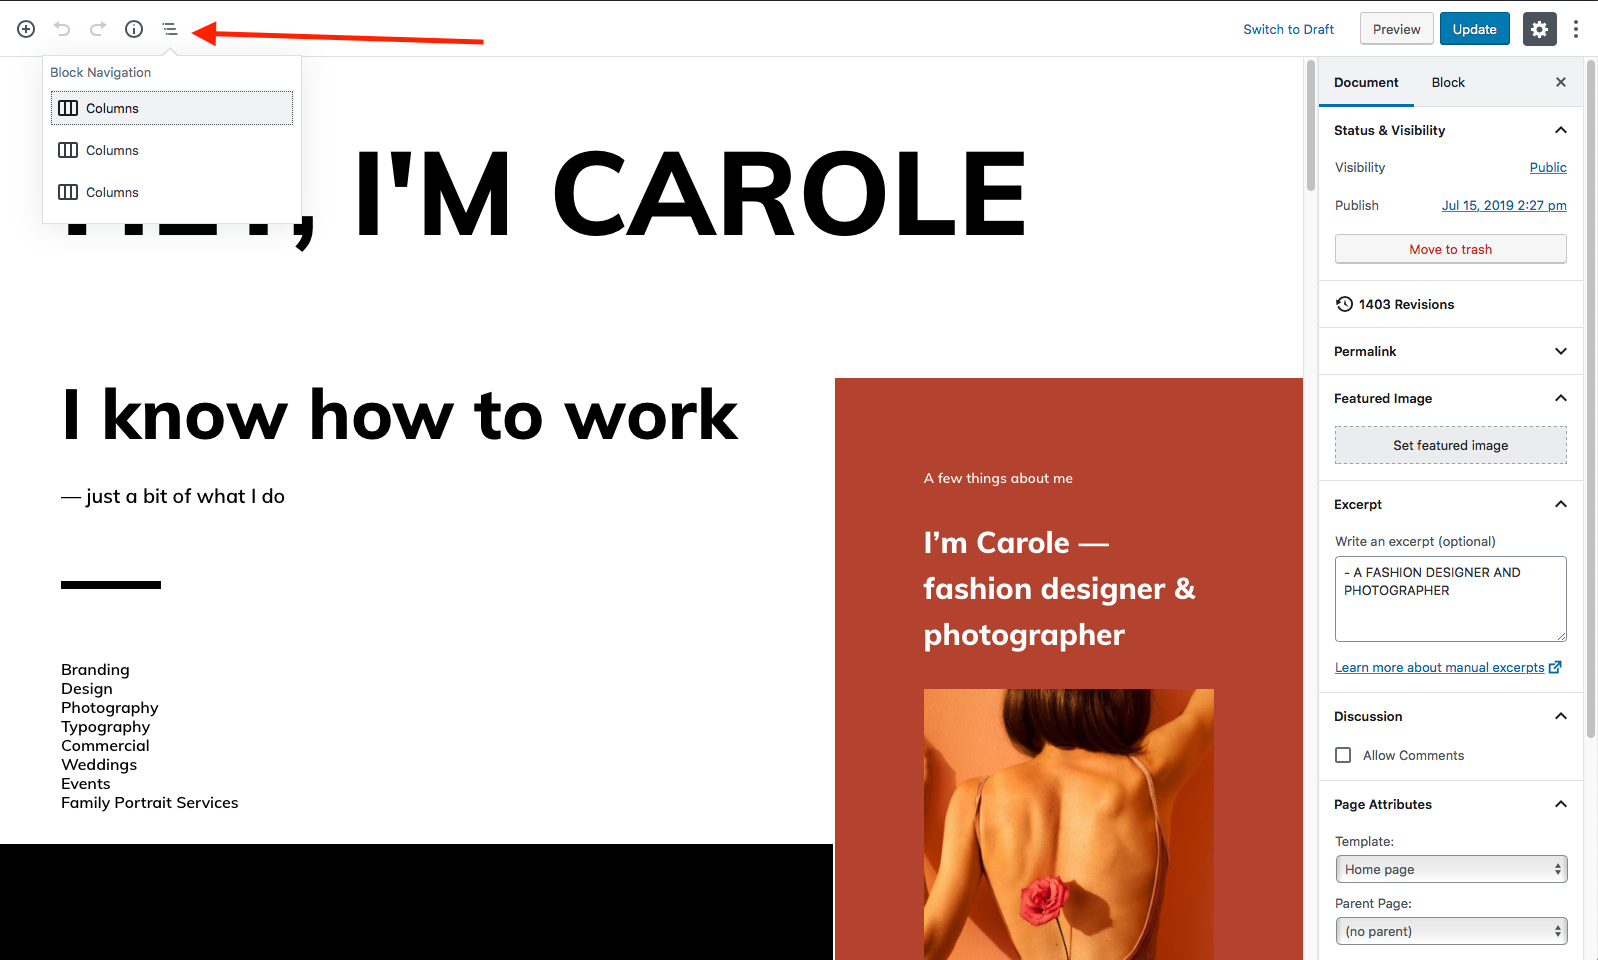
Parallax Columns
- Click the +Plus icon and select “Layout Elements › Columns”.
- Set columns number to 2
- Select columns layout
- Enable parallax

You can also select existing columns from block navigation.
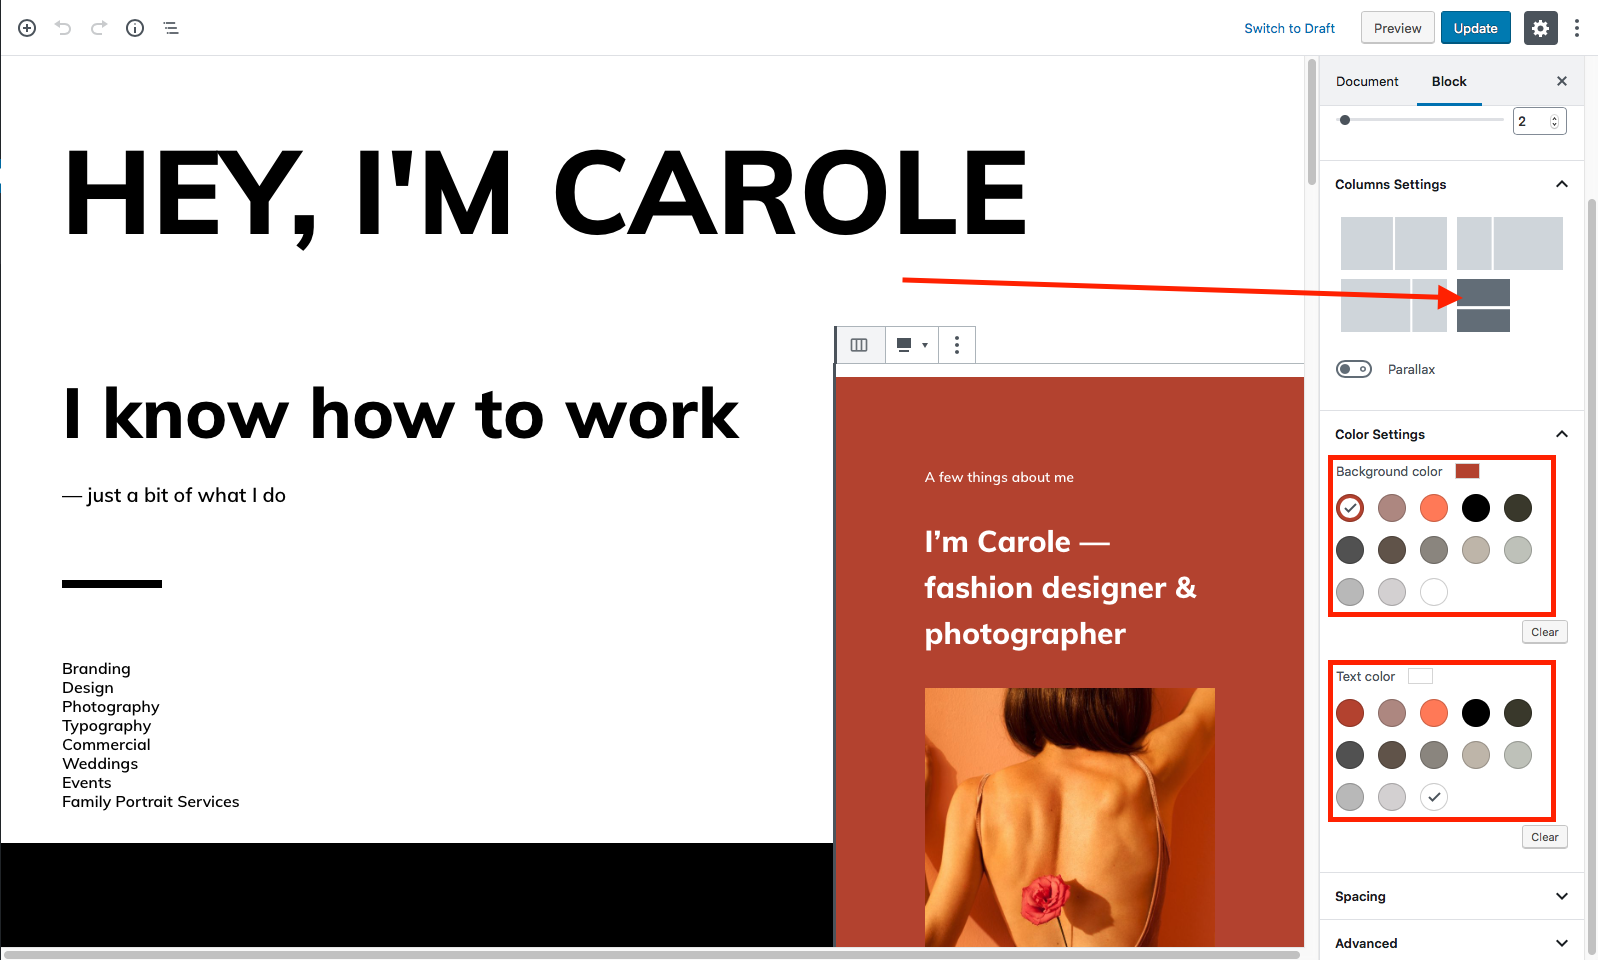
Vertical Columns with background
- Click the +Plus icon and select “Layout Elements › Columns”.
- Select columns layout
- Select colors for Columns block
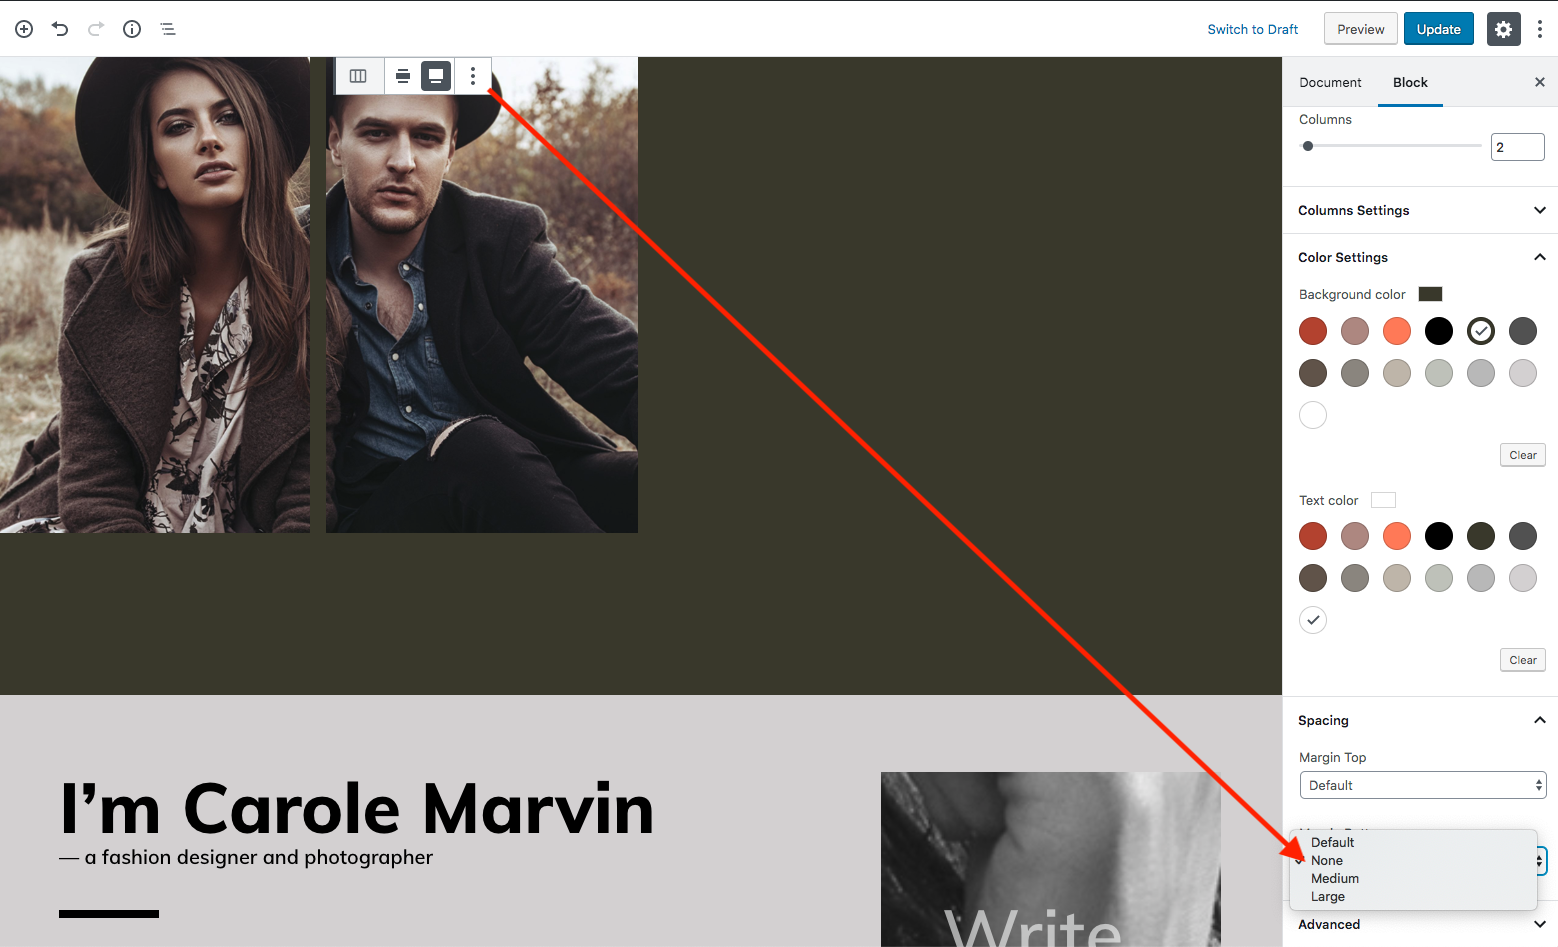
Spacing between blocks
- You can I add the space between two blocks by selecting one of the suggested values

Remove spacing between columns
- Select block and remove margin from bottom
Cover Image
- Click the +Plus icon and select “Common Blocks › Cover”.
- Set Block alignment to Full Width
- Set Background Opacity to 0
- Enable Fixed Background
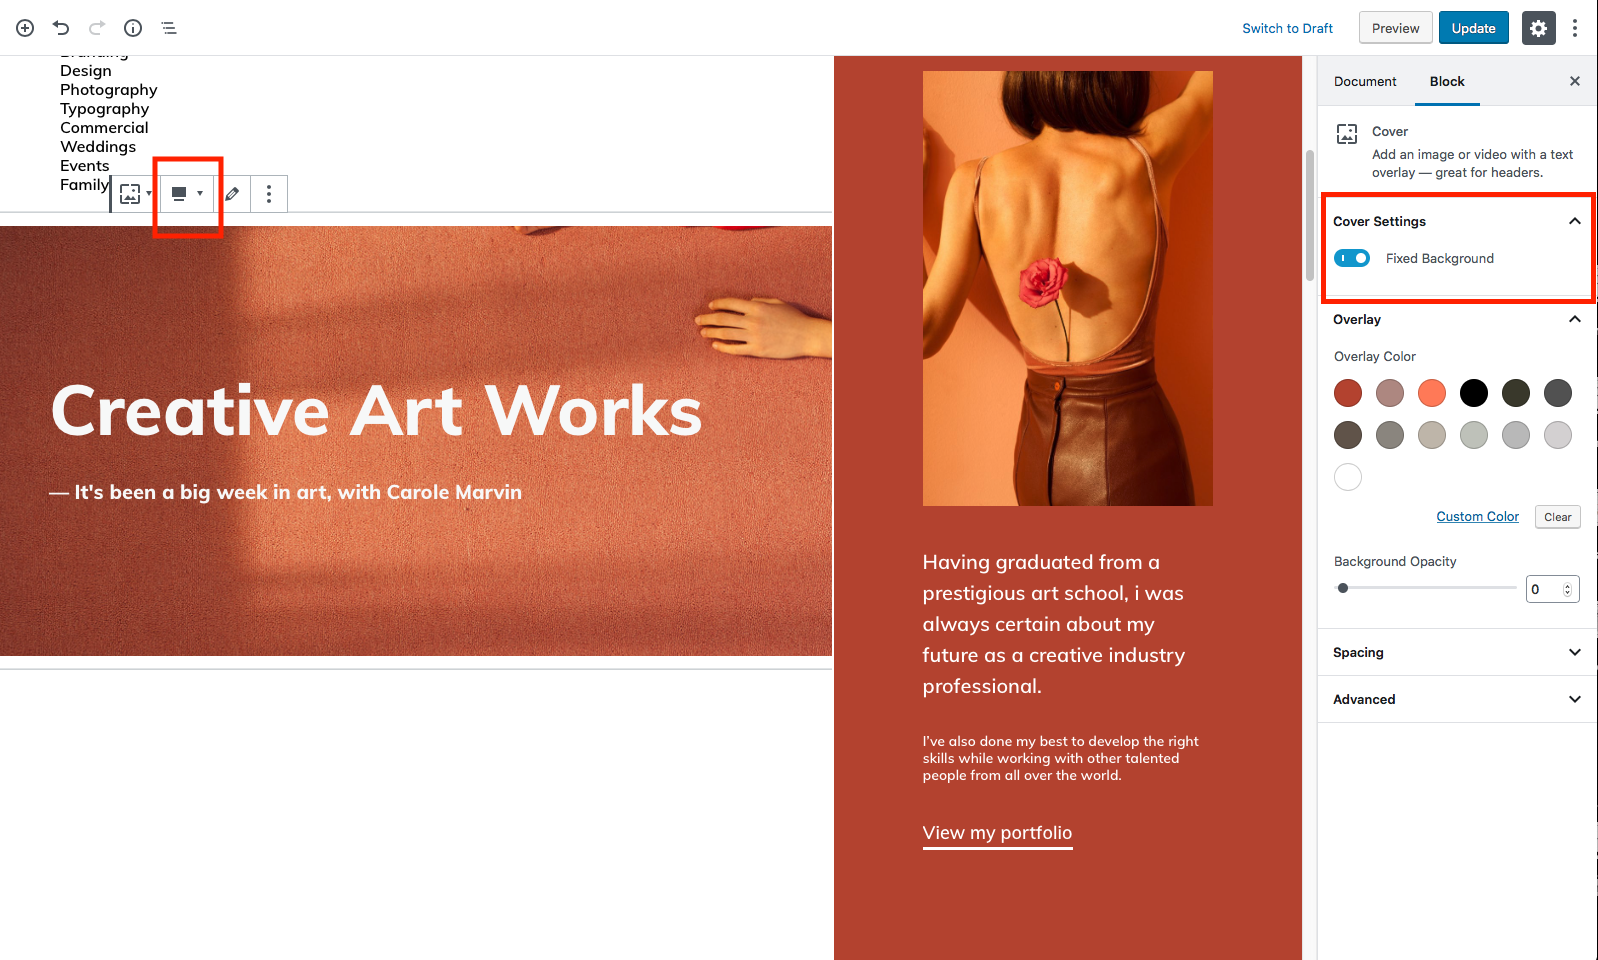
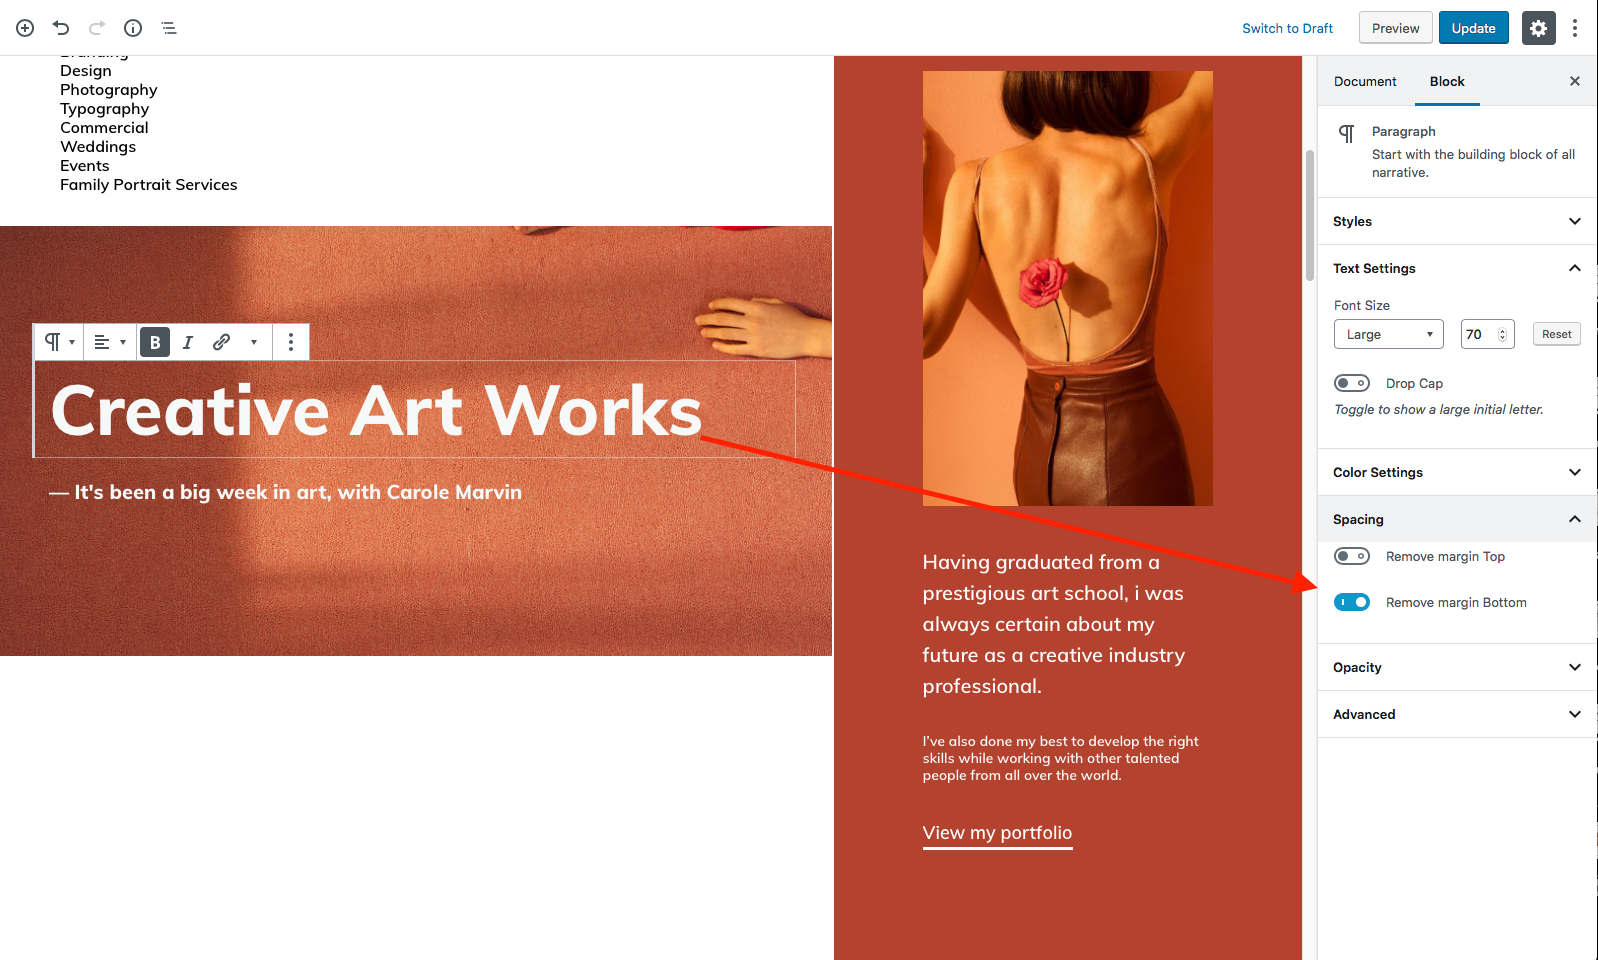
- Add the title and remove margin from bottom
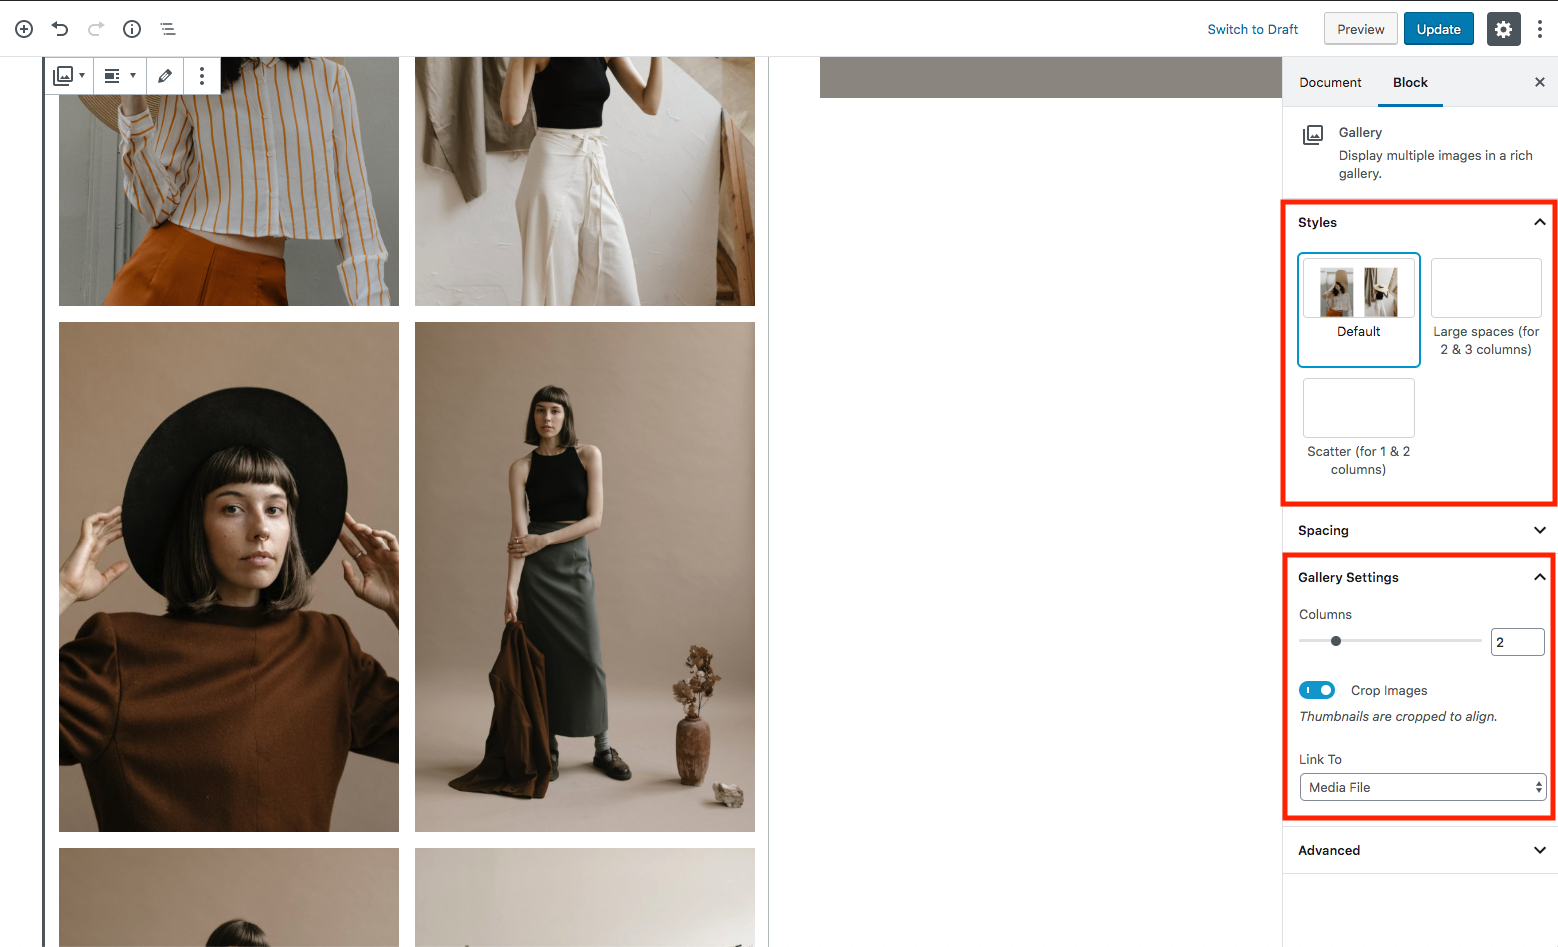
Gallery
- Click the +Plus icon and select “Common Blocks › Gallery”
- Set gallery columns layout to 2
- Set gallery style to Scatter
- Select Media File in the Link to field to activate zoom mode.
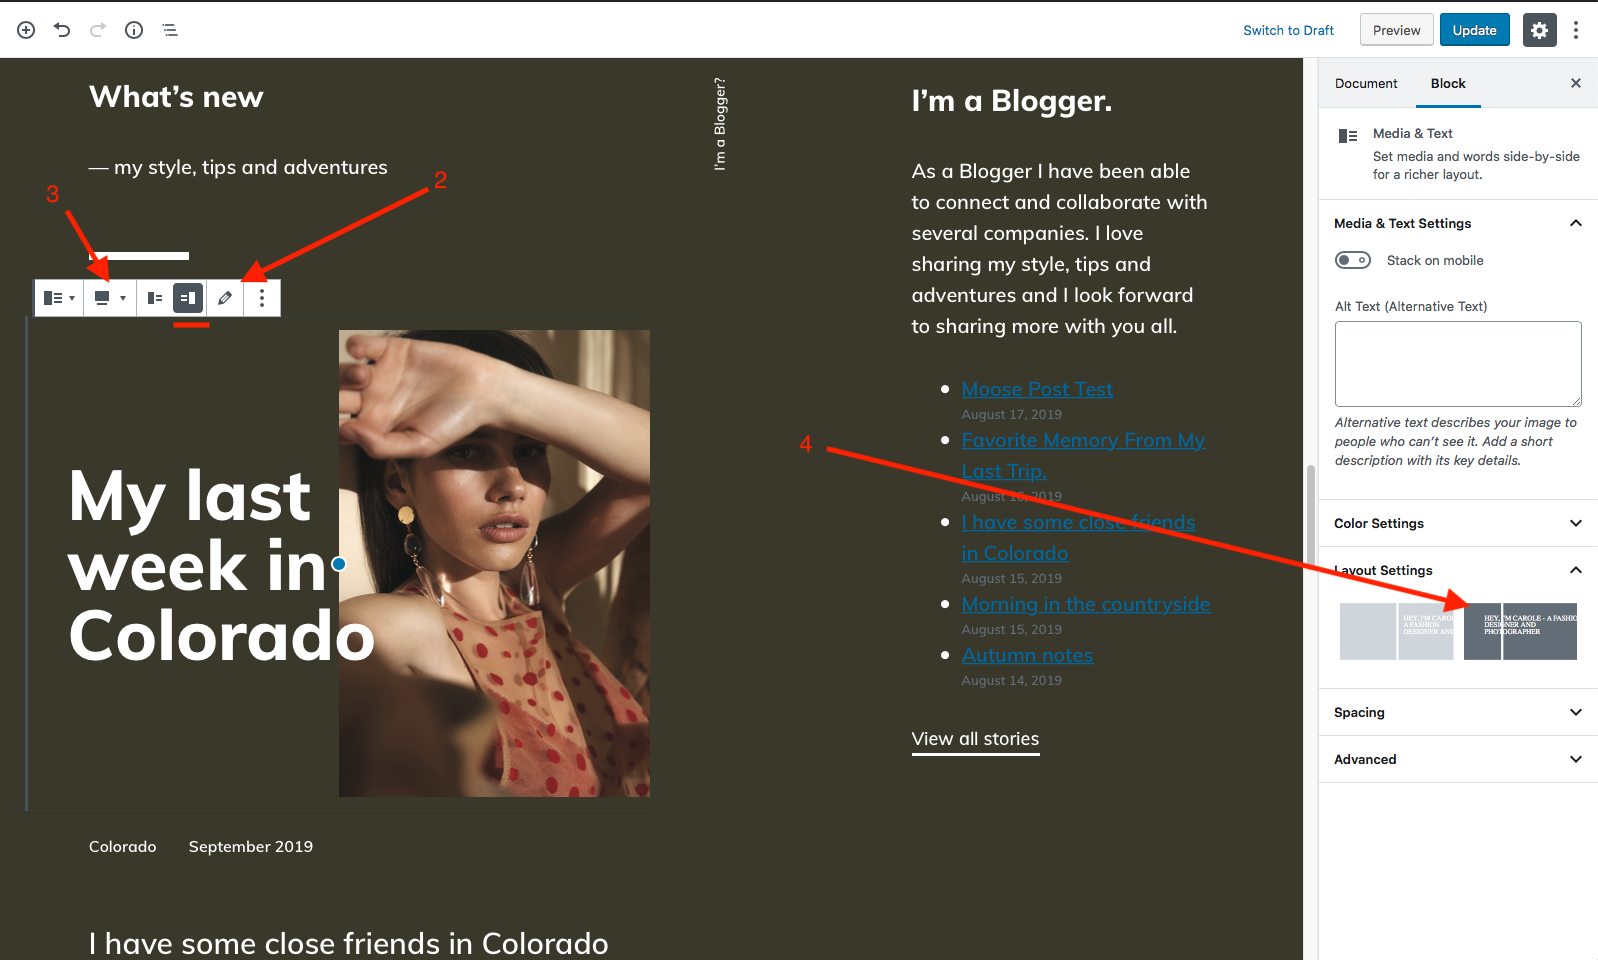
Media & Text
- Click the +Plus icon and select “Layout Elements › Media & Text”
- Select Image
- Set block align to Full Width
- Set block layout to Cover
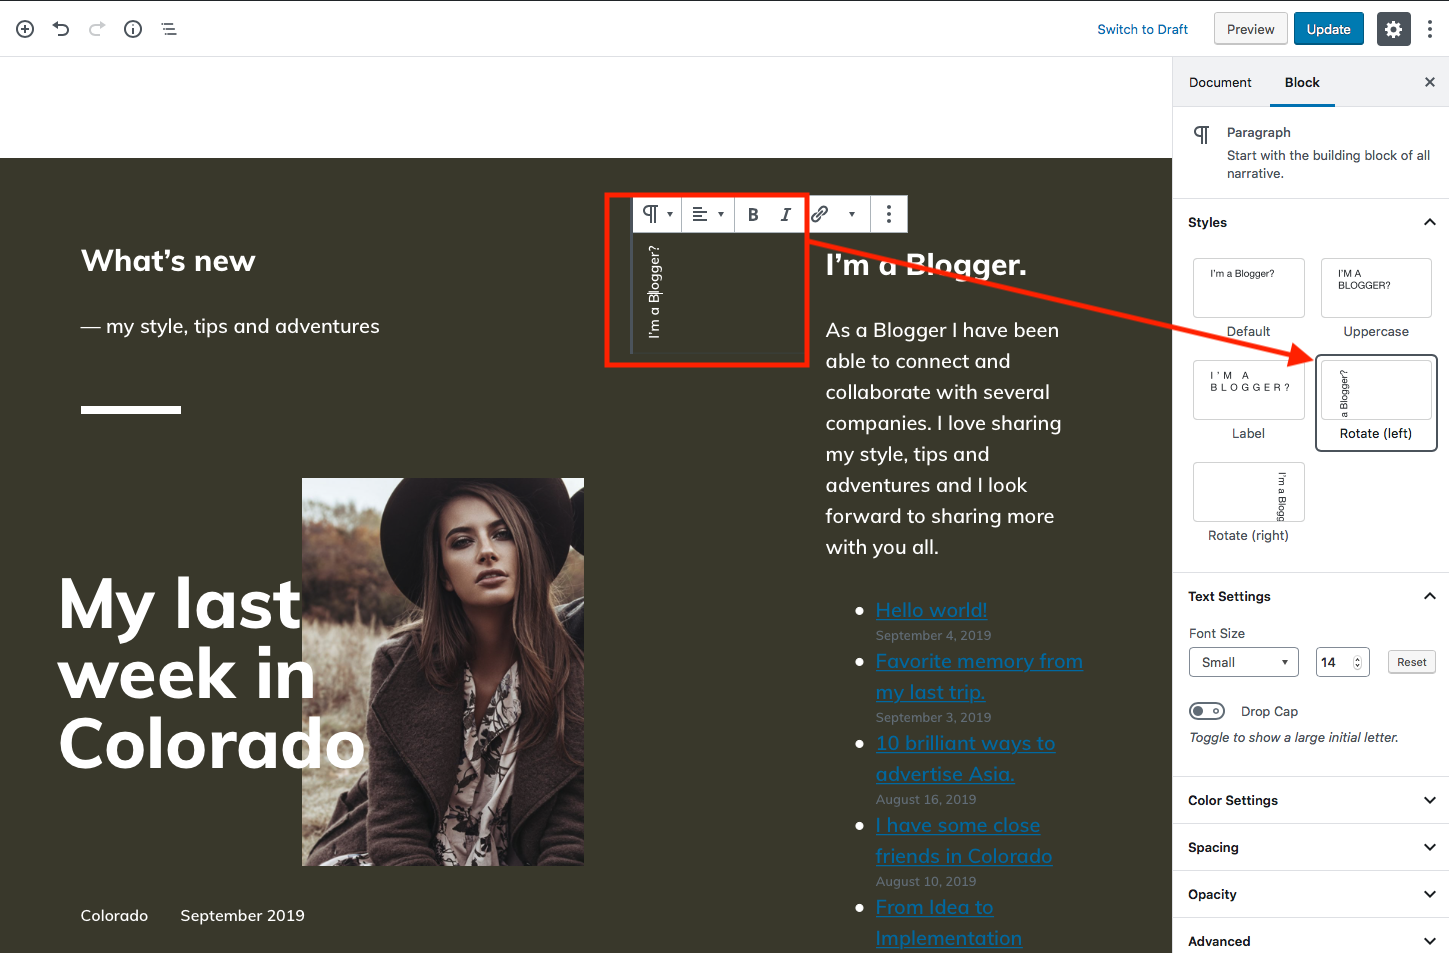
Rotated Text
- Select paragraph and choose one of the styles
Blog
- Create a new page by going to “Pages › Add New”
- Fill in the “Title” of the page (for example: “News”) and don’t add content, leave it blank. Any content here will be ignored.
- Press Publish and page will be saved
- Go to “Settings › Reading”
- Check the radio button “A static page (select below)” (if isn’t already checked)
- Select “Posts page:” called as created page (for example: “News”)
- Press Save Changes
Sidebar
- Go to “Appearance › Widgets”
- Add Widgets to the “Archive Sidebar” widget area.
Craise Theme makes it really easy to arrange your widgets in rows of columns. It works by adding a new ‘Column width’ select options at the bottom of your widget’s form that allows you to set a width value for each widget.
Portfolio
- Go to “Appearance › Install Plugins”
- Install and activate plugin Portfolio Post Type, if not installed yet
- Now you can add your portfolio items Portfolio > Add New Item
Add portfolio item to menu
- Go to “Appearance › Menus”
- Click on the screen options tab (Appearance > Menu top right corner) and check the “portfolio items” checkbox. A new option field should appear on the left side (underneath “pages” box, etc.).
Sidebar
- Go to “Appearance › Widgets”
- Add Widgets to the “Portfolio Sidebar” widget area.
Craise Theme makes it really easy to arrange your widgets in rows of columns. It works by adding a new ‘Column width’ select options at the bottom of your widget’s form that allows you to set a width value for each widget.
Menu
- Go to “Appearance › Menus”
- If you have imported the demo content you should already have the demo menu here, if not then you can create a new one.
- Select Create a new menu at the top of the page
- Enter a name for your new menu in the Menu Name box
- Click the Create Menu button
- Set menu location as Primary

Adding Items to a Menu
- Locate the pane entitled Pages.
- Within this pane, select the View All link to bring up a list of all the currently published Pages on your site.
- Select the Pages that you want to add by clicking the checkbox next to each Page’s title.
- Click the Add to Menu button located at the bottom of this pane to add your selection(s) to the menu that you created in the previous step.
Sidebar
- Go to “Appearance › Widgets”
- Add Widgets to the “Menu Sidebar” widget area.
Craise Theme makes it really easy to arrange your widgets in rows of columns. It works by adding a new ‘Column width’ select options at the bottom of your widget’s form that allows you to set a width value for each widget.
Customization
Before Customization:
- Go to “Appearance › Install Plugins”
- Install and activate Kirki plugin, if not installed yet
- Go to “Appearance › Customize” and Theme Customizer will appear
- Select desired section
- Make your changes which then you can see in live preview on the right
- Press Publish and settings will be saved
Smooth scrolling:
By default smooth scrolling is disabled.
- Go to “Appearance › Customize › Theme Settings › Base”
- Enable Smooth Scrolling